Showing posts with label recipe. Show all posts

Eggless Banana Loaf Recipe

first attempt

I enjoy cooking but I find baking to be a little anxiety-producing especially with how precise you need to be - so after getting sent this complimentary bag of Bob's Red Mill All-Purpose Flour, I thought I would give it a whirl and see if I could make something tasty, like a banana loaf.

It got a bit messy because the flour has such a fine powdery texture but it mixed well with the other ingredients. 

This was my first time making a banana loaf and it turned out pretty well - although I think I might have used a bit too much flour (I followed most of this lovely and step-by-step recipe) *Note: I also omitted sugar to keep it a bit more healthy, no glaze, and used oat milk not buttermilk).  I also thought maybe I'd add some frozen blueberries but my husband didn't like the texture from that - so I noted that for my next loaf.

Also another mistake, I got too excited after my husband said "wow that smells really good!" as it was almost done in the oven and he could smell it from his office room. I took it out, and I didn't let it rest properly so slicing was a bit of a mess.

Proud to say that my second loaf turned out well and now I've baked my third banana loaf. This was the outcome so I wanted to make sure I got a photo! I made this one for my parents to enjoy - although for added sweetness they can spread on some jam.

third loaf


While I'm still not that keen on baking and rather be cooking, I'm definitely proud at what I was able to accomplish with happy tummies all around!

Recipe: How To Keep A Magician Fed For Days

Although magicians don’t always share secrets with their audience, I’m going to let you in on a recipe for Shepherd’s Pie that you’ll want to tell everyone about!

We lead busy lives and if you’re a professional magician, the last thing you want is to fumble while dazzling your audience with a card trick or feeling fuzzy-minded performing a spectacular illusion. It takes passion for the craft, skill and countless hours of practice to perfect the art of magic.  Trust me, I know, as I have been with my magical man for almost a decade now.

Creating balanced meals that will fuel your body is important and so this is the version I do. It’s healthy, fairly simple to make and lasts for several days in the fridge. Of course,  you can tweak it to meet your culinary tastes and dietary requirements.

INGREDIENTS:
  • 4-5 medium potatoes, peeled or unpeeled (whatever you like) and then quartered with a knife. 
  • 2 cups (or more!) of assorted vegetables—I use a standard frozen vegetable mix often, as it’s more cost effective. You can use fresh veggies, but you will need to saute those separately in another pan.
  • 1 1/2 lbs of ground beef, pork, turkey, veal, or chicken. Whatever is on sale, that’s the meat of choice for this dish. *Vegetarians/Vegans – you can of course use veggie/vegan meat replacement and just follow the instructions as you normally would to cook it.
  • Seasonings of choice. Ex. oregano, basil, garlic, curry, turmeric, chives, parsley, sage, etc...

WHAT TO DO:

1 Boil the potatoes: Place washed, peeled (or unpeeled, if you like the skin on) and quartered potatoes in a large pot and cover with enough water.  Bring to a boil, reduce to a simmer, and cook until tender (about 20 minutes). Use a timer.

2.  In a frying pan, add your meat of choice and cook it up (you don’t want to see ANY pink my non-veggie friends!) Make sure to add whatever sauce and seasonings you want.

3. Revisit your mash potatoes. Use a fork to pierce for tenderness. You want them nice and soft so they will be easy to mash. When the potatoes are done cooking, remove them from the pot, drain the water, and place them into a bowl. Add butter or margarine, any seasonings of choice, and then mash away with a fork or potato masher until they are the consistency you want.  Set aside.

4. Preheat your oven to 400°F.  Wait for that oven beeeeeeeeep!

5.  Get out a large baking casserole dish (approx 8 x13), and pour the meat mixture on the bottom. Add a heaping amount of frozen veggies or your mixture of sauteed vegetables. Then spread the mashed potatoes evenly on top.  *Feel free to grate your favourite cheese or cheese alternative, if you’re looking for a richer cheesy potato flavour once it finishes cooking.

6. Bake in the oven and cook for approximately 30 minutes. I like to set my oven to broil for the last few minutes to get the potatoes a little extra brown.

7. Take out the dish WITH oven mitts and let cool down for a couple minutes. Cut into pieces and serve!


Straight out of the oven!


Recipe: Flourless Apple Crisp

Baking dish of Flourless Apple Crisp (left)
Portioned individual containers (right)
These are ready for the fridge/freezer.

I am not sure if I am allergic to certain foods or whether I have food intolerances, so I am awaiting an appointment with an allergy specialist in... August. Yep, the wait is long but I really hope I get a call sooner. The IGG testing is confusing, not to mention ridiculously expensive and eliminating a lot of foods from different groups all at once can be very harmful. Some say there is some credibility to these tests to at least give an indication of what foods you may want to try to start eliminating to see if that helps with inflammation, digestion, while others say it's a total sham.

 IGE testing seems to have more validity, but not total accuracy either.  I've been given mixed reactions from numerous health care practitioners on both, so right now I am pretty much on the "flexitarian" side of things, just trying to eat a balanced diet, although I have pretty much cut out most dairy (I love my substitute of Silk almond milk which has high amounts of calcium and protein and other vitamins/minerals!) and have limited red meat to once/twice a week because I find this seems to be helping with digestion.

Anyhow, I really enjoy making healthy treats and even though it's easier to buy a pie from the store or grab cookies off the shelf, I rather make food at home, with the occasional treat out.  So, looking through many sites, I found a great version for a Flourless Apple Crisp that I was able to tweak that was so easy to make, didn't require any sugar (aside from the natural sugar found in apples) and absolutely no flour! To sweeten it up a little bit bit, I did use a little bit no-sugar added jam, but that's totally optional.  You can add any toppings you like before or after too. Of course, this is not going to taste like the usual decadent apple crisp that you'd find in a restaurant, but I've been making this now for a few weeks now and it's pretty delicious and packed with lots of great nutrients, especially fiber from the oats!

What you need:
  • 4-6 medium sized apples of choice
  • 2 cups of oats (quick oats will work best)
  • unsweetened shredded coconut 
  • 1/4 tbsp of butter or margarine 
  • Sprinkle on as much cinnamon as you like
  • 1-2 tsp of oil
  • *optional for more sweetness: a spoonful of jam/syrup/honey
Directions:

Preheat oven to 350 degrees.

Peel and dice apples. Place into your baking dish. This is the most consuming part with peeling the apples so it's always nice to have a helping hand in the kitchen, if possible!

Set aside.

In a large bowl, combine oats, unsweetened shredded coconut, cinnamon, oil and jam (or other alternative as listed above, if desired).

Microwave butter or margarine for about 20-25 seconds (depends on your microwave) or until melted and pour into mixture.

Give it all a good stir. Add more margarine/butter and/or oil if it's still too dry.
Once you like the consistency, pour over the apples, making sure to spread out everything as much as you can to cover all the apples.

Bake for approximately 35 minutes or until the oats have a nice golden brown look.

Serve on its own or add some fresh fruit on top or even some ice cream on the side. You can eat this warm or cold. Also perfect for freezing once cooled.

Serving size is 6-8 depending on how much you fill each container. I used the smaller Rubbermaid containers, so that seemed like an ideal portion size.

Enjoy and make sure to leave me comments or send me an e-mail of your own creations!

Banana-Oatmeal-Flax Peanut-Butter-Chocolate Chip Treats


Another version taken from the original recipe that is really tasty! It's fun to experiment with different toppings.

Ingredients:

2-3 ripe bananas
2 cups of oats
1-2 teaspoons of ground flax
1/2 tsp of cinnamon
1/4 cup of oil
add your favourite toppings (in this one I used peanut butter, semi-sweet chocolate chips, unsweetened coconut, flax and raisins)

Directions:

Mash up the bananas well and mix all the ingredients together in a large bowl
Let sit for about 10 minutes.
Grease a baking pan and take a scoop of the mixture, roll into your hand and place on the sheet.
Flatten or leave them as is.
Spread them apart on the baking sheet
Place into the oven at 350 degrees for approximately 20-25 minutes.


Recipe: Cinnamon Sweet Potato Fries!

A good recipe to follow for Cinnamon Sweet Potato Fries.

What I did:

  • Washed 1 medium sweet potato. I like to keep the skin on, instead of peeling it all off, but the choice is yours. 
  • Cut in half and then chop in whatever way you want. (you can see that none of them are really uniform in shape, I just try to make them thick enough so they don't burn).
  • Drizzle extra virgin olive oil and sprinkle cinnamon and whatever else you want on them, and mix all together in a bowl. I just put on EVOO, cinnamon and a little bacon salt.
  • Spread onto a baking sheet, not overlapping any of them. 
I found that keeping the oven at 400 degrees worked well, then after 15 minutes, flipping them over and baking for another 15 minutes or so until they were all nice and crispy.

Once I took them out, I put a paper towel down for any excess oil.

They turned out great and really tasty! My boyfriend will have a nice snack at work tomorrow. ;)


Recipe: First Time Cabbage Rolls

With food prices soaring, we're eating a fair amount of frozen vegetables, instead of fresh ones. Fear not, despite what many have said, they are just as nutritious! My boyfriend, Bill,  went shopping the other day to pick up a few items and came home with a large cabbage. The previous one was made into cabbage soup and many days of raw cabbage salads and steamed cabbage and mixed vegetables. 

Thanks to Google I was able to type in "what to make with a head of cabbage" and cabbage rolls popped up. I love watching Youtube cooking videos because I am definitely a visual person. Just giving me instructions to cook doesn't always work.  So I came across Jenny Jones' Cabbage Rolls recipe. A couple seconds into the video, it occurred to me that this woman not only looks identical but also sounds like the famous talk show host "Let's Do A Makeover" Jenny Jones! I didn't know she was a cook, so this was a surprise.

Just a few things to note.

  • We used some different ingredients that suited us best, so i'll show the recipe below and what we used. Tweak to your tastes and I am sure these cabbage rolls will still turn out amazing.
  • We have also done this recipe many times without any meat, so it's vegetarian, just with rice and lentils. 
  • Be cautious when taking out the cabbage from the boiling water!
  • It took longer than 10 minutes for the cabbage we bought to soften enough to peel the top layer off and after a few layers in, we put it back into the boiling water for another 5 minutes to soften more.


Cabbage Rolls

Prep Time: 1 hour

Cook Time: 1 hour, 30 minutes

Total Time: 2 hours, 30 minutes

Makes: 16 to 24


Ingredients:

1 large head of cabbage (about 3 lbs.) – or use 2 smaller heads
1 Tablespoon olive oil
1 cup diced onion
2 cloves garlic, minced   Used a variety of Epicure spices to sprinkle into the meat mixture
2 large mushrooms, finely diced - 1 1/2 cups (optional) Bill does not like any 'shrooms
1 pound ground sirloin   we used extra lean ground beef
3/4 cup uncooked long grain rice 
1/4 cup chopped parsley
1 cup Pomi strained tomatoes or canned tomato puree   Large can of Hunts Tomato Sauce (look for low sodium kinds!)
1 1/2 teaspoons salt
pepper to taste
3/4 cup liquid (beef stock, cabbage water, or combine with some leftover tomato for 3/4 cup)

Instructions:

Bring a large pot of water to boil. Cut center core out of cabbage and place, core side down, in boiling water. Cover and simmer for 10 minutes.

While cabbage simmers, heat oil in pan over med-high heat and sauté onion and garlic 3-5 minutes until browned. Add mushrooms and cook another 2 minutes. Transfer mixture to a large bowl to cool.

Remove cabbage to a rimmed baking sheet, keeping water in the pot. Gently remove leaves from cabbage, cutting away from the core with a small knife. Set aside the best 16 unbroken leaves and cut off the thick spine in the center for easier rolling. Set all remaining broken or small cabbage leaves aside. (If the core is too firm, return it to boiling water for a few minutes to soften)

Preheat oven to 350° F.

To cooled onion mixture, add meat, rice, parsley, tomato, salt & pepper. Combine well.

Place about 1/4 cup of filling in each leaf, roll, and place seam side down in a 13 by 9-inch pan. Pour liquid over rolls and lay some leftover leaves on top. Cover pan tightly with foil, and bake for 1 1/2 hours. (Place pan on a cookie sheet in case it drips)

Remove from oven and let rest 30 minutes or better still, refrigerate overnight. 

Smelling these from the oven, we couldn't wait to eat them. After that we let the rest cool, put some in the fridge, delivered a couple to a friend who was ill, gave my parents some to try, and the rest went into the freezer!


Taken out of the oven

Ready to eat

Thanks again to Jenny Jones for a terrific recipe that we'll be making again since we just purchased another cabbage!

If you make these cabbage rolls, send me an email, or leave a comment on this post, letting me know how they turned out and what tweaks you made to this recipe!

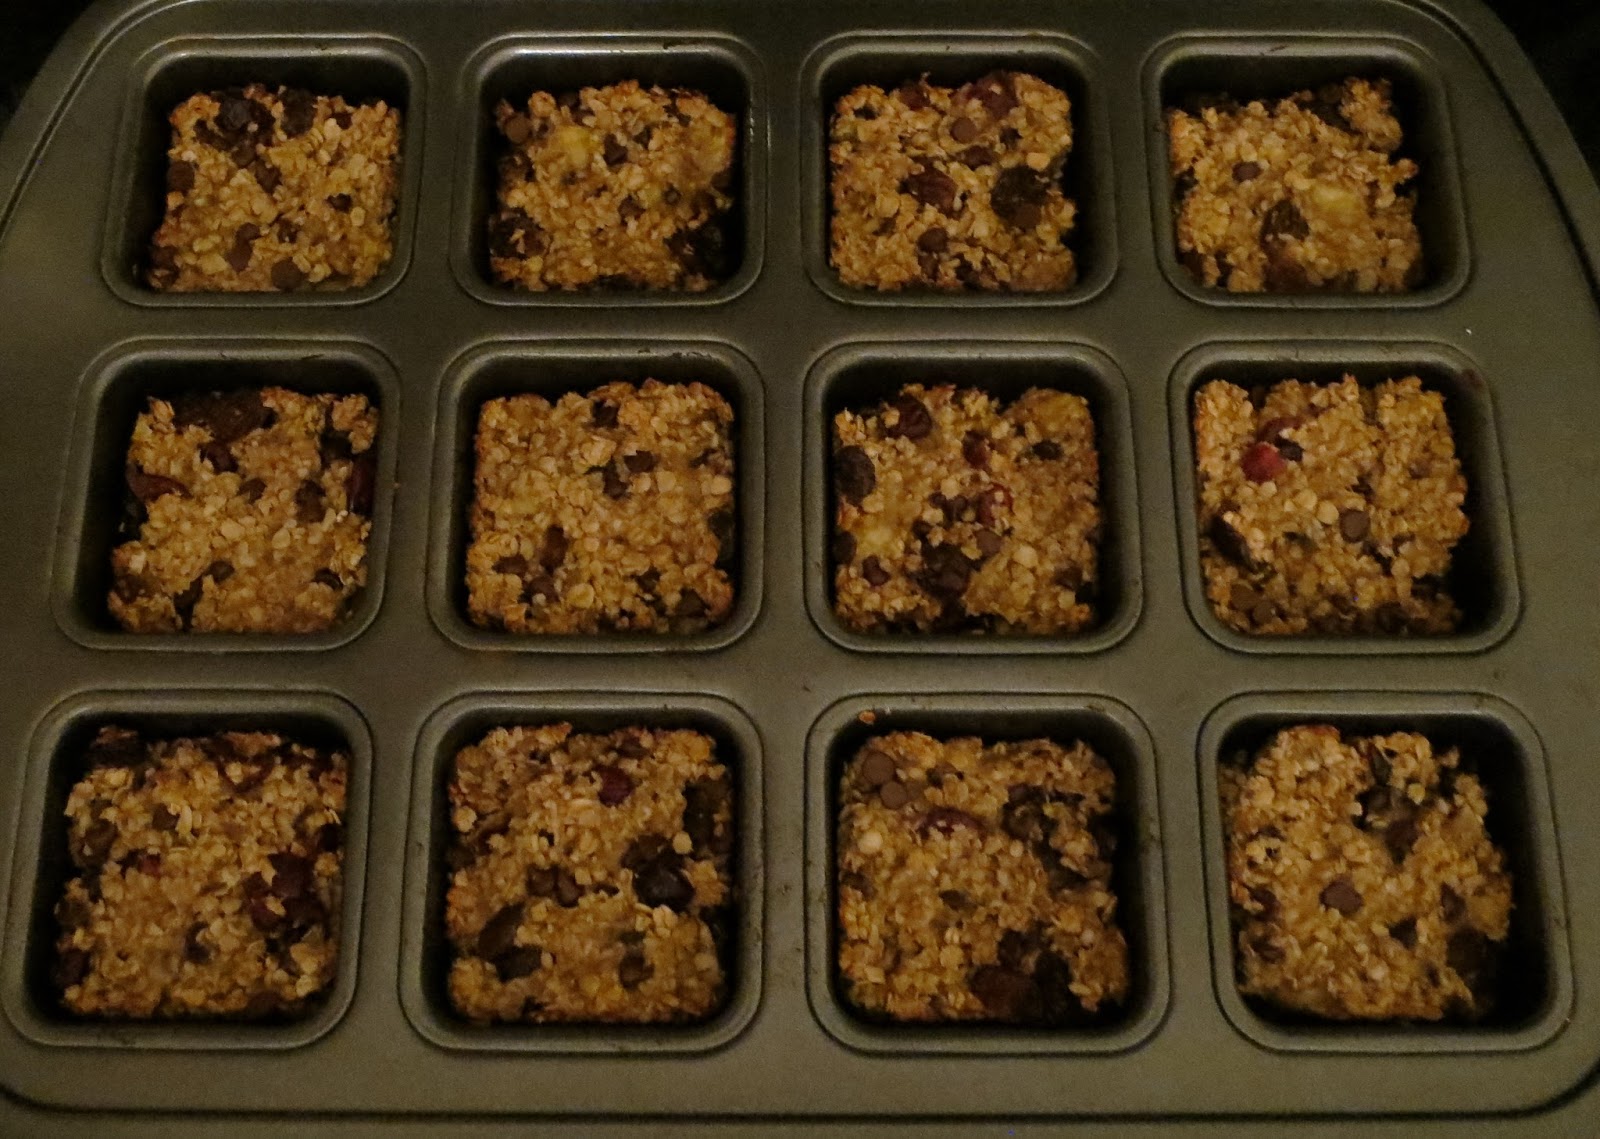
Recipe: Banana Chocolate Chip Craisin Oatmeal Hemp Seed Squares!

Well these cookies from Weelicious have been such a hit that I decided to use another pan that I had and see what they'd turn out like as squares. Yep, still amazing!  These are perfect for snacks, especially when you want something healthy and filling on-the-go. I've even had them for breakfast with yogurt. They freeze great too, which is another bonus. I love them nice and hot, so you can just pop them in the microwave for about 35-40 seconds. Makes 12.

Baking in the oven with The Pampered Chef brownie pan!
(Make sure to grease well so the mixture doesn't stick)

Hot out of the oven, waiting to cool

Another shot of them

Ready to enjoy!


Ingredients:

2-3 bananas
2 cups of oats
1/4 tsp of salt
1/2 tsp of cinnamon
1/4 cup of oil (I use extra virgin olive oil)
add your toppings (I used some craisins/raisins and some semi sweet chocolate chips - you can really use anything you like and put in as much or as little as you wish)
*one addition this time for added nutrients: raw hemp seeds

That's it!

Directions:

Mash bananas up well and mix all the ingredients up in a large bowl
Let sit for about 10 minutes.
Grease the brownie pan well, take a bit of the mixture and pat nicely into the pan to fill up the spaces.
Put into the oven at 350 degrees for approximately 25 minutes.

__________________________________

I'm really happy how these turned out and the fact that I just had to use a few ingredients - so budget friendly is a bonus.

If you make these, let me know how you like them!

Recipe: Banana (c)raisin chocolate chip cookies!

Cookies for breakfast? In this case, yes!


Ingredients:

  • 2-3 bananas
  • 2 cups of oats
  • 1/2 tsp of cinnamon
  • 1/4 cup of oil
  • add your toppings (I used some raisins and some semi sweet chocolate chips - you can really use anything you like and put in as much or as little as you wish) 

That's it!

Directions:

  • Mash bananas up well and mix all the ingredients up in a large bowl
  • Let sit for about 10 minutes.
  • Grease a baking pan and take a scoop of the mixture and place on the sheet. (I made some small and some a bit larger)
  • Put into the oven at 350 degrees for approximately 25 minutes.

------------------------------------------------------------------------

I took the recipe from Weelicious and just tweaked it a little.

I'm really happy how these turned out and the fact that I just had to use a few ingredients - so budget friendly is a bonus.

If you make these, let me know how you like them! I froze a bunch to see how they will taste for future snacking.

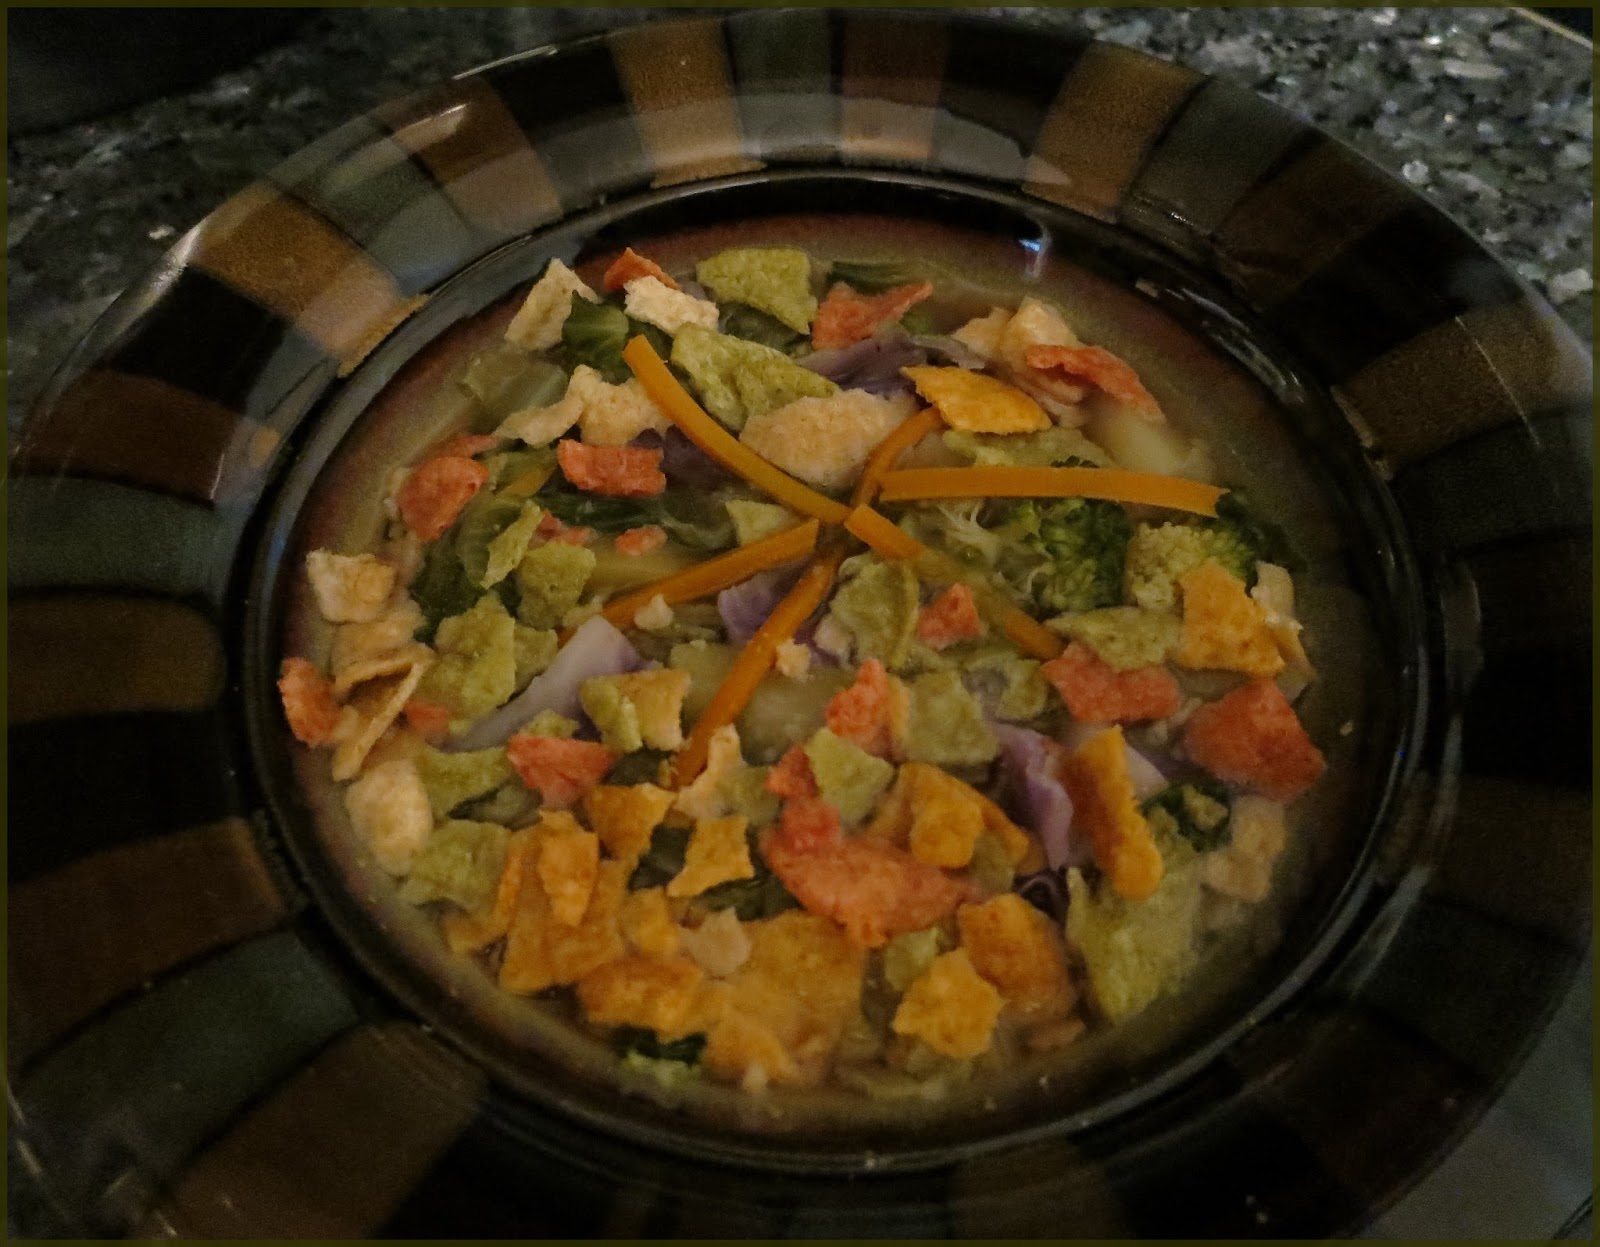
Recipe: October soup

Woke up feeling a little chilly and so I decided to head to the kitchen and make soup! I put in chicken broth, red cabbage, broccoli, carrots, lettuce, and potatoes. Added in Pesto seasoning from Epicure, garlic and crumbled some veggie chips.

Nothing fancy, just a delicious soup on a chilly October day. :)


Cooking with Pampered Chef


Everyone loves to eat. Sometimes we are able to spend a lot of time preparing delicious food for our families and, other times, we need to be realistic and realize that short-cuts are helpful and often necessary.

After attending a Pampered Chef party, I was immediately intrigued by PC’s newest item called the “Brownie Pan.”

If you’re not a baker, but take interest in cooking, like I do, don’t shy away based just on the name. This pan actually does so much more than just bake sweets. You can prepare appetizers and full meals.

There are hundreds of recipes that you can try and, since I have been craving lasagna for the last while, I decided to try out the Pampered Chef – Mini-Spinach Lasagna Squares.

With 12 individualized wells, aluminized steel provides ideal heat distribution and offers a non-stick coating for quick and easy clean-up. Say goodbye to those awful scrubby pads that end up ruining all your cookware.

Also, if you’re a little clumsy, the extended edges are a nice touch to the pan so you have a good grip with your oven mitts. It is also safe in conventional and convection ovens up to 450°F.

So what’s the downside?

Well, unfortunately, the only negative is that it is not dishwasher-safe, so this pan needs to be washed by hand. However, for the time that you ended up saving making dinner, it’s not a terrible inconvenience.

The Pampered Chef Mini-Spinach Lasagna Squares recipe:

  • 4 oz (125 g) part-skim mozzarella cheese (1 cup/250 mL grated), divided
  • 1 oz (30 g) fresh Parmesan cheese (1/4 cup/50 mL grated)
  • 1 pkg (10 oz/300 g) frozen chopped spinach, thawed and well drained
  • 2 garlic cloves
  • 1 3/4 cups (425 mL) marinara sauce, divided
  • 24 small (approx 1½-2-in./4-5-cm squares) frozen cheese ravioli (12 oz/350 g)
  • Preheat oven to 350°F (180°C). Using Microplane Adjustable Coarse Grater, grate cheeses; place in two separate (1-cup/250-mL) Prep Bowls.
  • In Classic Batter Bowl, combine ½ cup (125 mL) of the mozzarella, Parmesan, spinach and garlic pressed with Garlic Press. Mix well with Small Mix ‘N Scraper.
  • Place marinara sauce in (2-cup/500-mL) Easy Read Measuring Cup. Using the Measuring Spoon Set, spoon 1 tbsp (15 mL) marinara sauce into each well of Brownie Pan; top with one ravioli.
  • Using Medium Scoop, place one rounded scoop of spinach mixture on top of each ravioli. Top with another ravioli. Spoon remaining marinara sauce over each ravioli and sprinkle with remaining mozzarella.
  • Bake 20-22 minutes or until cheese is melted and sauce is bubbly. Remove pan from oven to Stackable Cooling Rack. Serve with Mini Nylon Serving Spatula.

I tweaked the recipe a little bit to meet our needs. I used a plain, low-sodium tomato sauce and added herbs and spices. For the cheese, I used a mild cheddar and about half the amount of what the recipe suggested, just to keep it healthier and not so heavy.

Lasagna squares waiting to go into the oven
This recipe is really versatile and allows for proper portion-control, so the possibilities are endless for what you can create. All the italicized items can be found on the Pampered Chef website.

I would recommend getting the Mini Nylon Serving Spatula if you’re going to use the Brownie Pan. You really can’t have one without the other. The spatula is designed to fit this particular pan, it lifts up items without scratching the finish, and it is dishwasher safe.

I was quite proud that I didn't have a lasagna meltdown on the plate. These mini lasagna squares were a hit and I even have a few leftovers for lunch tomorrow.

The pre-portioned lasagna squares are done and just waiting to be served.

The plated lasagna squares made easy with Pampered Chef.

Pampered Chef has a product line of over 500 items and, with the holidays right around the corner, this is one of the many gifts that beginner cooks all the way to the culinary chef, in your life, will cherish for a lifetime.

Cooking: Shrimpy Quinoa Bean Dinner

Looking for a quick dinner idea? I took this recipe from: Real Simple and tailored it to what I had available and also my preferences. You can too. :)

Ingredients:

-1 box of PC Organic Quinoa (1 1/2 cups)
-2 tablespoons unsalted butter
-1 tablespoon of minced garlic
-1/2 cup of onions, chopped
-handful of shrimp
-1 can of white beans, rinsed
-Spices (oregano, basil)

Directions:

-In a saucepan, bring 2 cups water to a boil.
-Stir in the quinoa - leave for 15 mins. Cover and let sit off heat for 5 minutes
-Heat 1 tablespoon of the butter in a large skillet over medium-high heat.
-Add the garlic and onions and cook for 30 seconds.
-Add the shrimp and cook, stirring, until they begin to turn pink, about 3 minutes.
-Stir in the beans and spices
-Cook until heated through, 2 to 3 minutes. Serve with the quinoa

The meal turned out great. I think it needs some additional seasoning though, like bbq sauce/sweet & sour since I didn't have the lemon juice to use.


Cooking: Quinoa Patties

So I finally tried out this Quinoa Patty recipe since it was brewing in the back of my mind for the last few weeks.

So what is quinoa? Take a read here to learn more about this nutritional powerhouse: Quinoa

Overall preparation was a little on the messy side, since you need to really get your hands in there to mix. Now if you have a gadget that makes perfectly round patties or you have another tried-and-true way (let me know please!), there's no need to use your hands. Getting the consistency right without everything falling apart was a bit of a challenge as well. I think for next time, maybe a bit more cheese needs to be added. However, even with some of it crumbling, once they were crispy with a nice golden brown colour, oh so tasty! I'm sure with practice, it will get easier. So despite a few bumps, these quinoa patties tasted wonderful and definitely will make them again!


Quinoa patties! (i tweeked some of the ingredients - mainly the filling)

2 cups cooked quinoa
2 eggs
chop any veggies you like
add herbs/spices of your choice (*love Epicure's herb and garlic for this!)
1/2 cup grated cheese (*we like marble cheese best)
1/2 cup bread crumbs

Combine everything but the quinoa in a large bowl and mix well. Fold in the cooked quinoa until it’s fully incorporated and the mixture is even.

Heat a large frying pan, with a drizzle of oil to coat, place on medium high.

Using a spoon and/or your hands, form patties with the quinoa mix and place them into the hot frying pan.

Cook each side for approx 3 minutes, or until golden brown. Don’t touch them for the first minute or two to prevent them from falling apart!

Flip, and cook the other side for an additional 3 minutes, or until both sides are golden brown.

Serve! =)

Cooking: Mango-pineapple spiced oven roasted turkey

My dad said it was about time... I knew it was too and so on Dec 3, 2011, my mom arrived armed with a roasting pan, thermometer and all the utensils needed to guide me in cooking a turkey!

The only hard part for me was lifting it to wash off the turkey, get out the guts and then putting it into the actual oven with the roasting pan. So it's kind of a 2-person job unless I got a smaller turkey next time, if I have to do it solo.


Muse's Radio Version Lasagna

My first attempt at making lasagna!

Lasagna noodles, ground beef, peppers (red, orange, yellow), carrots, zucchini, onions, Epicure herb and garlic spice, touch more of minced garlic to keep the vampires away :P ricotta cheese, PC marble cheese, and Meijers tomato sauce.